I just installed Lightrrom 4, and figured I’d give it a quick test. I found a photo that I took last year that was quite underexposed, to see what I can do with it. Right off the bat, when I made the process update to the LR4 “2012 process”, the photo was instantly much better. The ability to use the adjustment brush to selectively add noise reduction (to her skin tones only), and highlight and shadow adjustments (to the brick), in my opinion, make the photo much more pleasing. There aren’t many functional differences between LR3 and LR4, but my first impressions is that the technical aspects (the “algorithms”) used by LR4 is going to make my photos better and improve my workflow.
GPS Tagging DSLR Photos With iPhone
Call me a cheap b%st%rd, but I don’t want to invest $200+ to get the Nikon GPS unit, which to me is just a luxury.
I did some research (read: Google), and found a way to inject GPS data from my iPhone.
The work flow to accomplish this is the following:
– Start up an application on the iPhone called RunKeeper
– Take pictures
– Stop application
– Upload photos to Lightroom on PC
– Download GPS information from RunKeeper.com
– Use jFriedl’s GPS application to tie in the GPS coordinates with the photos
RunKeeper is a free iPhone app.
jFriedl’s GPS app has a free trial, and continues to work for free with some limitations. (It’s donationware, so it is inexpensive if you decide to use the full functionality.)
The great thing is that as long as your phone and camera’s clocks are in sync, you can keep the application running on your phone and it will keep track of where you were and at what time you took your photos.
This is my first attempt, so I am not sure how much of an impact running the GPS on the iPhone is on the iPhone battery.
The instructions that I followed is located here
First you need to log into the Runkeeper.com website (free to use), and download your GPS history – a .GPX file
The jFriedl plugin is activated by selecting all photos taken while you ran the Runkeeper application.
Browse for the GPX file that you downloaded to your computer.
I had to use GMT time as the time zone, as it seems that Runkeeper stored the history in GMT timezone (configurable?)
Click on the commit button, and the GPS coordinates get synced into the photo’s metadata, and gets updated with Flickr.
I tested the accuracy of the GPS coordinates, and it was bang on.
Obviously this workflow is pretty handy for photowalks, but I’ll have to see how long my iPhone lasts for. It’s a pretty involved workflow if you are intending to only GPS tag one photo – it would probably be easier to use Google Maps or the Flickr location tool
Lightroom 3 and my workflow
I do most of my “darkroom” workflow with Adobe Lightroom (version 3). Adobe Lightroom is a very powerful and cost effective application that manages your photo library (think database), and also has very effective photo editing capabilities.
Let me break down the application into it’s five modules, and I will also quickly describe my workflow with Lightroom. The five modules are: Library, Develop, Slideshow, Web, Print.
My workflow always starts with Import to Library, Library workflow, Develop workflow, and optionally Web or Print functions.
Library
If you don’t use any software to manage your pictures, and you take as many pictures as I do, relying on your Operating System to find pictures is not an option. For example, let’s say I want to find all the pictures of my son, or all the pictures of people that I like enough to put into my portfolio. With thousands of pictures on your computer, browsing folder by folder would be daunting.
Lightroom manages your files both at the Operating System level (file system), and at a logical level via Collections. Let me illustrate. After taking pictures, I put my SD memory card into my computer (via card reader). I then go to Lightroom’s Import Dialog. The dialog allows me to tell it where to put the files, auto naming it by date if I desire (I do), and allow me to quickly choose development presets and keywords.
Keywords are key to finding pictures again, as you can search by keyword (eg. “River”, “Model”, “Daughter”, “Sunset”), and you can even create smart collections based on keywords.
In the Library module, you can see a tree view of your computer’s folders and images; you also see the Collections, which are the logical folders you create. A photo can be a part of one or more collections, and collections can be “smart” – i.e. find photos based on criteria you provide it.
In my workflow, I have a Collection set called “Complete”, and a Collection set called “Work in progress”. These “sets” contain my collections. (Collections can be hierarchical, like folders in your computer file system).
When I add a large quantity of photos, I will create a collection under the “Work In Progress” set. Within that collection, I will make a sub collection called “picks”, which will contain all of the pictures I have flagged to indicate that I like them.
I then go through the pictures I like, and choose my favourites amongst the ones that are similar (or near identical). These go into my “selects” sub collection.
I then start developing the “selects”.
The keys to the Library module are the different representation of your photo storage: physical (file system) versus logical (collecti0ns, collection sets and smart collections).
The Library module manages your metadata (keywords and camera settings). It also allows you to tag images by colour flag, by rating (1 to 5), or by “pick” or “reject”. I mostly use “pick” or “reject” to sort through my images, and I use the colour flags to indicate “processed” and “exported” (e.g. to web).
Develop
The develop module allows you to do common photo development and correction, such as converting to black and white, fixing colours and exposure, minor blemish touch up, etc. This description definitely understates how powerful the develop module is; however for advanced editing, such as the need of a “clone brush” for certain photos, or if layers are required, another photo editor, such as Photoshop, is required. Lightroom integrates with Photoshop naturally.
In my workflow, for serious editing, I export photos to Photoshop Elements. Once I am finished editing in Elements, I will re-import the adjusted image back into Lightroom.
Other external editors that I export to from Lightroom include Photomatix, for HDR images (merging 3 images of different exposures), and Topaz plug-ins. I’ve discussed Photomatix in a previous post. Topaz plug-ins are very powerful plugins that provide “filter” effects, such as detail enhancement, colour modifications, and noise reduction. Oh did I mention that Lightroom 3 has superb noise reduction capability too?
Lightroom allows you to specify external editors, and being able to open a photo for editing in other editors right from the Lightroom interface is invaluable to my workflow.
Slideshow
The slideshow module allows you to create slideshows of your pictures. I don’t use this much, but it’s a cool feature should I ever want a slideshow. 😀
Web
This module allows you to publish photos to your website for your portfolio or for customers. This is so easy and powerful, you have to see it to believe it. There are a few templates you can choose from, and Lightroom will automatically create the webpage and upload it to your website (provided you give it the right login information).
There are other great web templates you can download for free and for purchase. I personally like the templates from the Turning Gate (http://theturninggate.net/)
The print module is a powerful print engine that allows you to layout and print (with many options) your photos. Since I mostly outsource my printing, this module is rarely used in my workflow.
Exporting
While this isn’t a module per se, exporting is a huge part of my workflow. With many available plugins available for Lightroom, I can easily export photos to Flickr (a photo sharing site) or Facebook, with my favourite settings remembered. You can see many of the images I have exported from Lightroom in my Flickr stream: http://www.flickr.com/photos/focusonottawa/.
Nik HDR Efex vs. Photomatix Pro 4
HDRSoft’s Photomatix Pro has been the undisputed leader for HDR processing for years. Now Nik Software, which produces amazing filters for Photoshop, has released HDR Efex. I am a Photomatix user, and recently gave the Color Efex demo a whirl. I also recently upgraded from Photomatix release 3 to release 4.
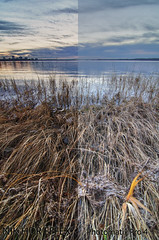
These two images were created with what I considered my favourite presets from each of the applications.
I definitely like the presets available in HDR Efex better than Photomatix (and there’s more of them).
I’m sure you can get a picture of similar quality (saturation, tone and contrast) in Photomatix as you can in HDR Efex using the sliders, but the bottom line is – which of the two improves your workflow?
Photomatix Pro has 12 presets to choose from. These are divided in 3 methods of HDR tone mapping: enhancer, compressor, and fusion. The ability to see previews of the presets is a new feature in version 4.
The Nik Color Efex has over 30 presets, which are more than just HDR settings, but add effects like gradients, vignetting, and tonal contrast. Since these are things that I will typically add post-Photomatix in my workflow, this is a significant workflow improvement.
One key difference between Photomatix version 3 and 4 is the addition of (semi) manual ghosting handling. What version 4 does is allow you to circle parts of the image that have ghosting problems, and it will focus on those components. Nik Color Efex has ghosting handling too, but it only offers automatic.
I haven’t put ghosting handling to the test in these versions, but this blog has a great comparison of the different versions and how they handle ghosting, and clearly Photomatix handles ghosting better.
When I shoot, I try to avoid situations that lead to ghosting (i.e. people walking, animals, wind blowing vegetation, etc), so fixing ghosting is usually a non-issue.
In my personal opinion, although I’ve only just started playing with the HDR Efex demo, and I’ve just only started using Photomatix version 4 (having recently upgraded from 3), I prefer the output from HDR Efex. I’m not sure if I like the difference enough to warrant shelling out US$150, as I do own the less expensive and still very powerful Photomatix Pro, but it is tempting.


