HDRs

Barn

You might look at a scene and say that the buildings look terrific, the people look terrific, the sky is gorgeous, you point your camera and shoot. Then you look at the LCD and ask yourself what went wrong.

All cameras have a limited dynamic range. The human eye on the other hand has a terrific dynamic range.  What this means is if you expose for the sky then the ground, buildings, trees and people might be underexposed. And if you expose for the people, the sky might be overexposed (i.e. white).

To overcome this a fairly new technique emerged called HDR, short for High Dynamic Range. How this works is via software, multiple exposures are combined so that the dark foreground and the bright background are combined into a final picture.

The easiest way to achieve an HDR image is to use the auto bracketing functionality of your DSLR camera, if it supports it. Set your camera to take 3 exposures, one at -2 exposure, one at +2 exposure, and one at normal exposure. Since the +2 exposure will typically be a longer exposure, and it would be unwise to try to do this handheld, it is best to use a tripod for HDR shooting.

Now that you have the exposures, you need to merge the 3 (or more) photos into a final photo.

Looking at the following three examples you can see what I was talking about earlier. When the sky and clouds are clearly seen, the statue is black. When the features of the statue are visible, the sky is overexposed and the clouds are much less visible. When the picture is underexposed, the details around the sun are more visible

Picture at normal exposure
Picture at +2 exposure compensation
Picture at -2 exposure compensation

You can use Photoshop to do this. Personally I use Photomatix, which you can get from HDRsoft. Photomatix has plugins for Lightroom and Photoshop. You can try the demo; the only limitation is it watermarks your outputs.

The software isn’t automatic, you need to play with the settings to get the result you desire. Some HDR images look hyper-real, but you can get a realistic image from an HDR as well.

Here’s how I rendered the above images into an HDR.

Final HDR
Final HDR

Note how the features in the sky and on the statue are clearly defined, which was not the case in any of the previous three images.
Fast Lenses

You may have heard the term “Fast Lens” when referring to a good quality lens. I find the term “Fast” a bit misleading, although technically accurate.

A fast lens is a lens with a large aperture. So a 50mm lens with the largest aperture of f5 may not be considered a fast lens, a 50mm lens with the largest aperture of 1.4 is very fast. Remember the aperture size is the size of the opening or diaphragm of the lens. A smaller number means a bigger opening.

The reason it is a “fast” lens is that, if you recall from my previous post on aperture, a larger aperture lets in more light, and thus the lens aperture does not need to be left open for as long as a lens with a smaller aperture.

This is significant! Imagine shooting an indoor wedding with low light. Let’s say the church doesn’t allow flash, and doesn’t allow you to use your tripod. If you shoot with a slow lens, you will need to use a slower shutter speed to get a well lit shot of the bride and groom. Since we humans tend to shake, a longer exposure will reveal that shaking, and will be exhibited as blur. A faster, better lens will be able to take the same shot in a much shorter exposure, thus leading to less camera shake and resulting in a sharper image.

Photo Editing Done Cheap

Most websites and magazines will talk about Photoshop as being the tool to edit photographs. Unfortunately Photoshop costs US$699, which is out of reach for most people. Adobe does have Photoshop Elements, which is a much less expensive, yet very capable scaled down version of Photoshop.

Personally I use Gimp, which is an open source photo editing software. As far as photography editing goes, Gimp has all of the capabilities of Photoshop that I need, and best of all, it’s free!

The majority of the tasks that I require for photo editing are features of both Gimp and Photoshop:

  • Dodging and burning
  • Layers
  • Cloning and Healing
  • Curves adjustments

The interface of Gimp may take some getting used to if you’re familiar with Photoshop, but once you’ve learned to navigate it, it is a very powerful tool. Download it and try it out for yourself.

Stock Photography and Modeling

Stock photography is when you take commercial photographs, but where there is no one customer commissioning you for the photographs. The photographs are typically placed on a stock photography website, such as iStockPhoto, and sold to many customers. Customers will use these images for their websites, for magazine ads, etc.

A typical stock photo you’ve probably seen is of a pretty young woman answering a helpline, which would be used on many websites for their “support” web page. It could also be pictures that convey business concepts, such as teamwork, frustration, meetings, etc., or it could just be a picture of a couple lying on a beach, which would be used by a travel agency.

One of the premiere photographers in Stock photography is Yuri Arcurs. He has great tips in the form of videos on his YouTube channel. He not only shows tips for the photographer, but useful information for models who want to do stock photography.

Take a look at this video, and you can see his other videos from the same YouTube page.

Food Photography

A plate of food at your favourite restaurant may look and smell very enticing when the plate is placed before you, but it doesn’t always seem as appealing when you take a picture of your plate. In order to compensate for the lack of smell and taste, it is tricky to get a good shot of food. Here are some tips for taking a great picture of food.

Auto-ISO and Studio Lighting

You have your studio set up. You shoot your grey card. You take a reading with your light meter. “F5.6 at 125 shutter speed at ISO 200”.

Great. You take a second and third reading to make sure. You set your camera to (M)anual mode, you dial in F5.6 and 1/125 second shutter speed. Your ISO is already showing 200. You take a photo, and the picture is overexposed without hope. What went wrong?

If you do a lot of outdoor shooting, you probably have set your ISO to auto, meaning your camera will bump up the ISO if it thinks you will be underexposed at your current settings. Since the camera took its light metering without your studio strobes firing, it thinks it’s too dark, and it has just bumped the ISO to something like 3200, which is not what you want.

When shooting in a studio, make sure to turn off the auto ISO feature, or you will be sorry.

Bokeh

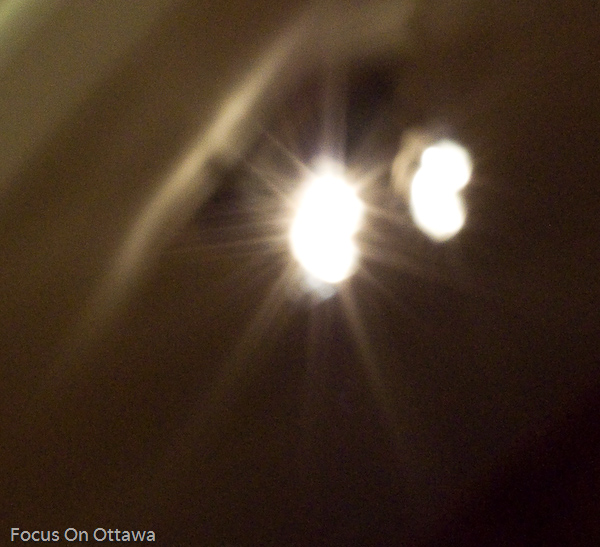
Bokeh is a term from Japanese that means “blur” or “haze”. When using a lens with a shallow depth of field (e.g. you have it set to F1.8, as opposed to F22), light sources outside of your focus area can get hazy, and may appear as spheres of light. This could be a pleasing effect if intentional.

Here are some examples of pictures showing bokeh, and lack of bokeh.

The first shot shows a picture with a light source that’s out of focus. Since the shot was taken at a small aperture (F22), the light does not seem hazy. (Remember: an aperture with a high number, like F22, means a small opening).

Bokeh_1764Figure 1: No Bokeh

The second shot uses a large aperture (F1.8), so the out of focus light source looks more like globes of light.

Bokeh_1763Figure 2: Same light fixture, but with bokeh
For more on bokeh, check out this article in Wikipedia.

How to Photograph Your Pet

Everyone loves taking snapshots of their beloved pet. In order to get the best snapshot of your pet, or any animal in general, follow these simple rules.

  1. Focus on the eye. When you are focusing on your pet, focus in their eyes. This is especially true when using a large aperture where the rest of their body might be out of focus – the key item you need to capture is their eyes, because that’s the first thing viewers will look at.
  2. Get down to their level. When photographing animals, it’s not very exciting to photograph them from four feet above them. Get down to their level and see the surroundings as they see it. It’s much more dramatic that way.
  3. Don’t corner them. When composing or cropping the shot, make sure they are walking into the picture, and not out of the picture. So if they are walking left to right, make sure they have some empty space on the right side of the picture for them to “virtually” walk into, otherwise it will seem out of sorts.
  4. Crop close. Although this rule can be broken often, especially if you want to capture more of the surroundings or more of the action, a close composition more often than not has more impact.

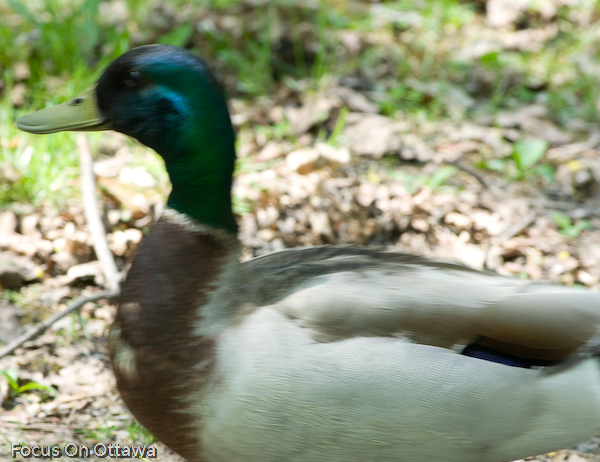
Here is an example of breaking the rules with an animal. It’s not my pet, but you’ll see that the focus is not on the eyes. The picture was taken slightly higher than the animal. The animal is also trying to walk outside the frame, and has no room in front of him. This gives the picture an unnatural feeling.

Bad Duck

Figure 1: Bad animal picture

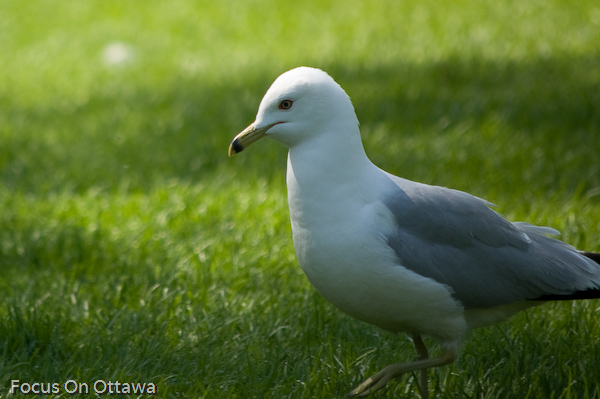
Here’s a better picture. The shot was taken closer to the eye level of the bird. The focus was done at the animal’s eye. The animal is walking into the picture, and not out of the frame, giving a more natural feel. The picture was cropped close enough to show the details of the animal, but not so close as to give it a “trapped” feeling.
Good seagullFigure 2: Better image

Are Megapixels Important?

Marketing folks love to promote Megapixels when advertising cameras. Are Megapixels what you should be looking at when you are buying a new camera? Not necessarily.

A Megapixel is a million pixels, or “squares” of colour on your monitor or printed photograph.

It is true that more pixels means you can print and display larger pictures. How many Megapixels do you need? You can print an 8×10 picture with a 4 Megapixel camera without any problems. You may not notice any improvement going to a 6, 8 or 10 Megapixel camera if all you are printing is 8x10s or smaller.

Going to higher Megapixels can also be problematic. If you increase the number of Megapixels without increasing the size of your image sensor (the digital chip that captures the image), then you can actually introduce noise in your picture, making things worse.

Read the reviews for cameras, and don’t buy solely on Megapixels. Check out the cameras sensor size, and it’s sensitivety to light (especially in low light situations).

I’ve used a 3 Megapixel camera that takes better pictures than a 14 Megapixel camera I’ve also tested.

For an excellent site for reviewing cameras, ignore the Megapixels and check out Digital Photography Review.

Aperture, Shutter Speed and ISO

The aperture is the size of the opening in your lens to allow light onto your sensor or film.The wider the aperature, the more light that comes in at any instant. Aperture is measured in f-stops. A higher number means a smaller opening, which means less light.

The shutter speed is how fast the shutter is open to allow light in. The longer the shutter is open, the more light that comes in over a period of time.

To get the same exposure with a higher f-stop (smaller hole), you need to leave the shutter open longer, thus you will need a slower shutter speed. You want to make sure the shutter speed isn’t too slow, because vibrations in your hand will affect the image. If you need to use a long shutter speed, you will want to use a tripod to stabilize the camera.

ISO is a measurement of film. A higher ISO number means it is more sensitive to light, and you can speed up your shutter speed if you use a higher ISO film. In digital cameras you obviously can’t change the ISO of the film, but digital cameras let you emulate ISO values. A word of warning: higher ISOs increase noise in pictures (or “grain” in film cameras).

Here is a neat utility that let’s you see first hand how aperature, shutter speed and ISO affect the quality of an image.